Featuring Brushstroke Stamps, Day 1
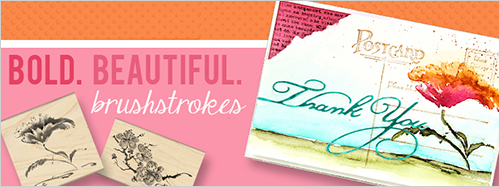
Join us as we explore products from our newest release, Bring on the Happy. Each week you’ll find a special designer showcase, videos, and card samples with complete supplies and instructions. This week we take a closer look at our newest brushstroke stamps.
Today Heather Telford brings our beautfiful brushstrokes to life for our first “Bring on the Happy” designer showcase!
As part of this designer showcase, Heather has documented exactly how to achieve this look so you can too!
Supplies: 40-329 the Sweetest Sound, 30-283 Snippets, Fabriano Hot Pressed Watercolor Paper, Strathmore Cold Pressed Watercolor Paper, Green Cardstock, Memento Inks (Nautical Blue, Cantaloupe, Olive Grove, Espresso Truffle, Bamboo Leaves), Winsor & Newton Masking Fluid
Step 1: Splatter masking fluid on watercolor paper (5.75″x4.5″). Let dry completely then tape to firm waterproof surface. Paint water onto right hand side of panel. Press Nautical Blue and Cantaloupe inks onto an acrylic block so you can pick up some ink with a paintbrush and drop it onto the wet paper. Keep adding ink with a large brush until you are happy with your background color.
Step 2: While the paper is still wet, ink only part of a branch on The Sweetest Sound stamp with Espresso Truffle and Olive Grove Memento markers. Stamp in top right and bottom right corners of panel and let it bleed into wet background.
Step 3: Let panel dry then ink stamp with the following Memento markers:
Espresso Truffle – branches, beaks
Olive Grove – leaves
Nautical Blue – bird bodies
Bamboo Leaves – bird backs and tail feathers
Step 4: Spritz inked stamp with water then stamp onto watercolor panel.
Step 5: Using a water brush (or paint brush) and water, blend color on birds. Add detail to eyes with Espresso Truffle marker. Cover birds with your hand or a scrap of paper then spritz water over branches to make the image bleed.
Step 6: Splatter Olive Grove and Nautical Blue ink around panel. Add definition to branches or leaves with the fine tip of Memento markers if desired. When the panel is dry, remove masking tape and rub off masking fluid. Add sentiment from Snippets set.
Step 7: Mat panel in a coordinating color then pop up on textured watercolor paper card base.
Shop for today’s featured Penny Black supplies:
- 40-329 The Sweetest Sound
- 30-283 Snippets
- And don’t forget to follow us on Facebook, Pinterest, YouTube, Instagram, and Twitter!


A gorgeous work of art – fab tutorial, thank you! xxx
Gorgeous!
Lovely. Thanks for the tips. Hugz
Super wow!
Chiara Robin
Magnifique!!! Thank you so much!
LOVe this and how it is done!!
Gorgeous Heather!!! Wow!
This is beautiful. Will make a wonderful design piece for any room in the house.
Oh so breathtaking!!!!!!! You make me want to buy lots of PB stamps, so I guess that’s a good thing!
Fabulous design and tips … this card is a work of art!
Beautiful work Heather! TFS
This is beautiful Heather! Great tutorial!
Beautiful. What is masking fluid?
Masking fluid is a liquid you can buy in the watercolor paint section of an art store. It is rubbery and masks the area where you paint or flick it while you add colour. When you have finished painting or stamping you rub it off to reveal white underneath.
Beautiful card!!! Thanks for the tutorial.
Awesome! Love the tutorial … time to open that jar of masking fluid!!
Thank you for the amazing tutorial!
This is so beautiful! Thank you so much for detailed tutorial:)
This is so amazing. Thanks for the great tutorial! I’m intrigued by this technique and can’t wait to try it. Love the Sweetest Sounds stamp set.
Beautiful design Heather! As always you make everything look so easy. TFS how you do it!!!
Paper Hugs,
Jan
Fab card and tutorial! Bookmarked it for future ref. Thx!
gorgeous painterly look! The new stamps are delicious!
OH MY! I ALWAYS LOOOOOVE these “water color” type of techniques! WHAT A GORGEOUS CARD!!!!!!!!!!!!!!!!!!!!!!! 😉
Love these ‘watercolour’ stamps, they are fantastic. Love the card.
wow, it looks so easy. stunning.
Wonderful technique, looks beautiful!
Such a beautiful piece! Thank you for the tutorial and sharing your talent!